Access Controls
Access controls are implemented through the use of permissions. Permissions are granted to each connection established to Relaybox. These permissions are linked to API keys, which provide access to rooms at either a global or more granular level.
Assigning Permissions to API Keys
When an API key is generated, you determine which permissions to attach and to which rooms they will apply. This configuration is managed via the dashboard. API key-based permissions can be added or removed at any time, allowing you to fine-tune access controls across your system.
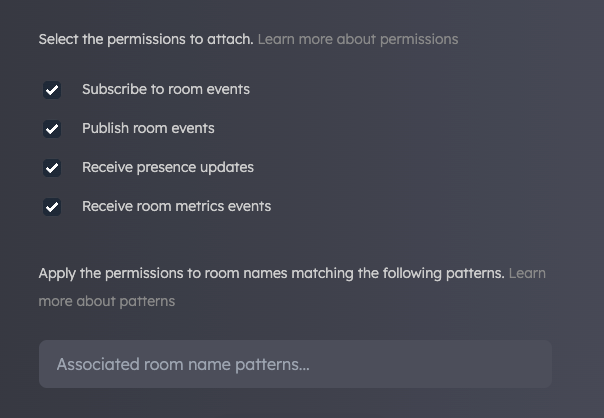
Using the checkboxes, you can control what actions a connection using an API key is permitted to perform. To further refine permissions, you can apply pattern matching to room names, targeting permissions to a subset of rooms.
Pattern Matching
Before discussing pattern matching, it's important to note that permissions are global by default. This means that if no patterns are applied to an API key, the attached permissions will apply to all rooms in your application being accessed using that key.
As mentioned earlier, pattern matching allows you to tailor access controls for specific rooms.
Let's take an example where we have an organization with two teams: a marketing team and an engineering team. We want our marketing team to receive real-time sales analytics updates and the engineering team to get bug reports as they occur. However, the marketing team does not need to know about bugs (until they're fixed!), and the engineers are generally not interested in sales figures.
To achieve this, we can create two rooms: a) 'sales-analytics', and b) 'error-reporting'. While we could create one API key and use room names to filter relevant events to each team—which would work well—creating two API keys with pattern matching ensures that each set of events is securely accessed by only the relevant team.
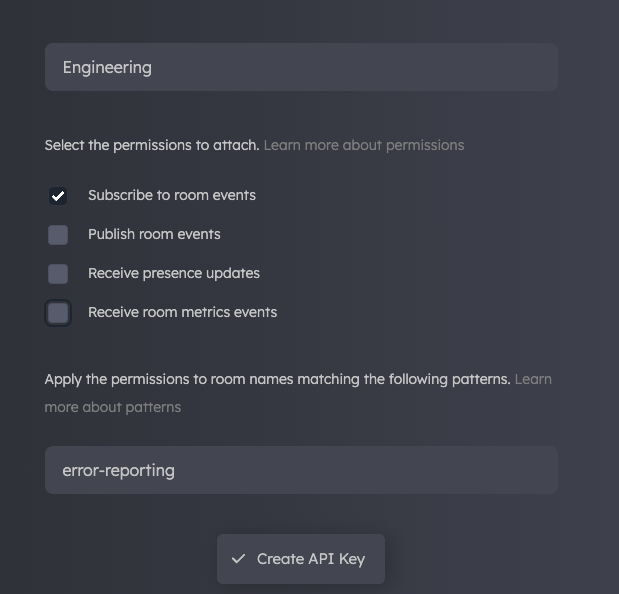
In the image above, we see that an "Engineering" key has been created, allowing the "subscribe" permission for the "error-reporting" room. By distributing this key to the engineering application, we ensure that engineering team can specifically subscribe to "error-reporting" events.
Wildcard Pattern Matches
To extend the previous example, let's imagine a scenario that requires a more granular level of control over the permissions granted to an API key for certain rooms. This is where wildcard pattern matching comes into play. Wildcards essentially namespace permissions so that they apply to a broader set of rooms.
For example:
user:* // matches user:123 and user:123:messages
user:*:messages // matches user:123:messages and user:456:messages
user:*:updates // matches user:123:updates but not user:123:messages
Dynamic Permissions
Dynamic permissions allow you to control room access at a more granular level. Consider users and rooms that may receive private messaging related to individual users. Creating a new API key for every user might be manageable with a very small user base, but as numbers grow, this becomes untenable.
Dynamic permissions allow you to assign permissions dynamically, attaching them to authentication tokens at the point of creation.
Referencing the example above, we have a user named Becky, a member of the data analytics team. The in-house messaging system provides real-time updates specific to individual users. The API key is shared across an environment with 50 team members. Becky's user ID is 123, and Nasir's user ID is 456. We need a way to provide Becky and Nasir access to their individual rooms, but no one else should have access.
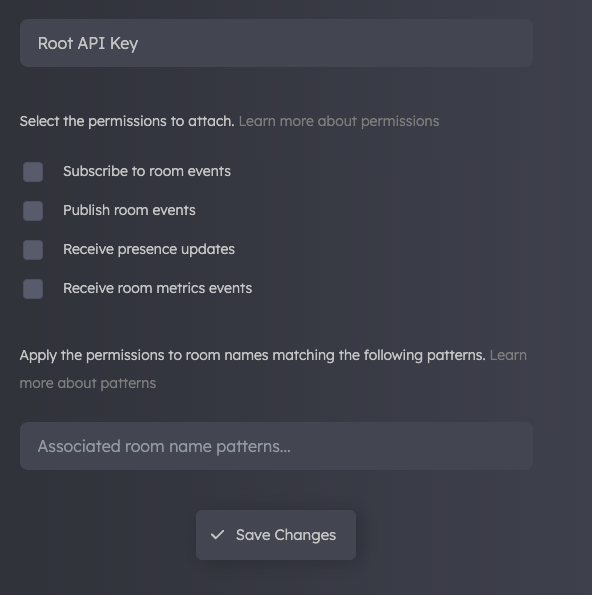
In the dashboard, we create a zero-trust API key with no permissions attached. This key is purely for accessing Relaybox services.
In the Auth Tokens section, we set up an auth endpoint using Express to generate authentication tokens enabling connection to Relaybox.
// Server side
import RelayBox from '@relaybox/rest';
import express, { Request, Response } from 'express';

const relayBox = new RelayBox({
  apiKey: xxxx.xxxx.xxxxxxxxxxxx // Use API key responsibly on your server
});

app.get('/user/auth', (req: Request, res: Response) => {
  // Request from user 123 (Becky)
  // Dynamically assign permissions based on the identity of the request
  const permissions = {
    'user:123': ['subscribe', 'publish', 'presence', 'metrics']
  };

  const tokenResponse = relayBox.generateTokenResponse({
    clientId: 123,
    permissions
  });

  res.send(tokenResponse);
})
The endpoint defined above grants user 123 (Becky) access to actions in private rooms using the zero trust API key we created in the previous step. In the client-side application, Becky would connect as follows:
// Client side
import RelayBox from '@relaybox/client';

const relayBox = new RelayBox({
  authEndpoint: `/user/auth`, // Your secure authentication endpoint
})

await relayBox.connect();

const privateRoom = await relayBox.join('user:123');
Joining and Creating Rooms
Consider the following statement:
const myRoom = await relayBox.join('myRoom');
The code above connects a user to "myRoom". If this room exists, the connection will be made and the user can begin to subscribe to events. If the room does not currently exist, it will be created.
If there is an error when joining the room, an exception will be thrown. The recommended pattern for handling a room join error is using try/catch syntax:
try {
  const myRoom = await relayBox.join('myRoom');
} catch (err) {
  console.error(err);
}
Leaving Rooms
When you no longer wish to receive events in a specific room, simply call:
myroom.leave();
This will clear all event listeners for the room, and no further messages will be sent.